

Enable fingerprint authentication on Dell XPS 13 9310 running Linux Mint
Fingerprint authentication has always been flaky for Dell XPS series when running any GNU/Linux distro. I tried a bunch of things to enable the fingerprint authentication, and after a lot of trial-and-error I've succeeded in activating fingerprint based authentication on my Dell XPS 13 9310 running Linux Mint 21 (vanessa).
First of all, here's the device used for fingerprint on my 9310:
% lsusb | grep -i fingerprint
Bus 003 Device 002: ID 27c6:533c Shenzhen Goodix Technology Co.,Ltd. FingerPrint
I couldn't find a vendor-provided kernel module to use for this device, even (at the time of writing) my kernel version is fairly recent -- 5.15.0-43. So I need to go through a bunch of things from various resources and here's the summary of what I did to make the fingerprint authentication work:
Step 1:
Add the following entries to the APT sources list e.g. in a new file /etc/apt/sources.list.d/dell-xps-fingerprint.list:
deb http://dell.archive.canonical.com/updates/ focal-dell public
deb http://dell.archive.canonical.com/updates/ focal-oem public
deb http://dell.archive.canonical.com/updates/ focal-somerville public
deb http://dell.archive.canonical.com/updates/ focal-somerville-melisa public
We're gonna install some necessary packages from the above Dell repository next.
Although, I'm using Mint 21 which is based on Ubuntu 22.04 LTS (codename jammy), the repo actually is for Ubuntu 20.04 LTS (codename focal). This repo doesn't have packages for jammy so need to use the focal ones, but the packages still work the same, so we should be good.
Step 2:
Download the GPG key for the new repository to our local GPG keychain for APT:
sudo apt-key adv --keyserver keyserver.ubuntu.com --recv-keys F9FDA6BED73CDC22
Step 3:
Install the necessary packages:
sudo apt-get update && sudo apt-get install oem-somerville-melisa-meta libfprint-2-tod1-goodix oem-somerville-meta tlp-config
Step 4:
Now it's time to add the fingerprint -- run the following and add the fingerprint (usually the right index finger):
fprintd-enroll
You'd need to switch the position of the finger multiple times in the process. When it's done, run the following to verify the fingerprint:
frintd-verify
Step 5:
Now, we need to install the PAM (Pluggable Authentication Modules) module for the fingerprint daemon (fprintd) so that we can use the fingerprint for authentication:
sudo apt-get install libpam-fprintd
Step 6:
Let's update the PAM config to include out new change:
sudo pam-auth-update
The above command would give a setting window like the following:
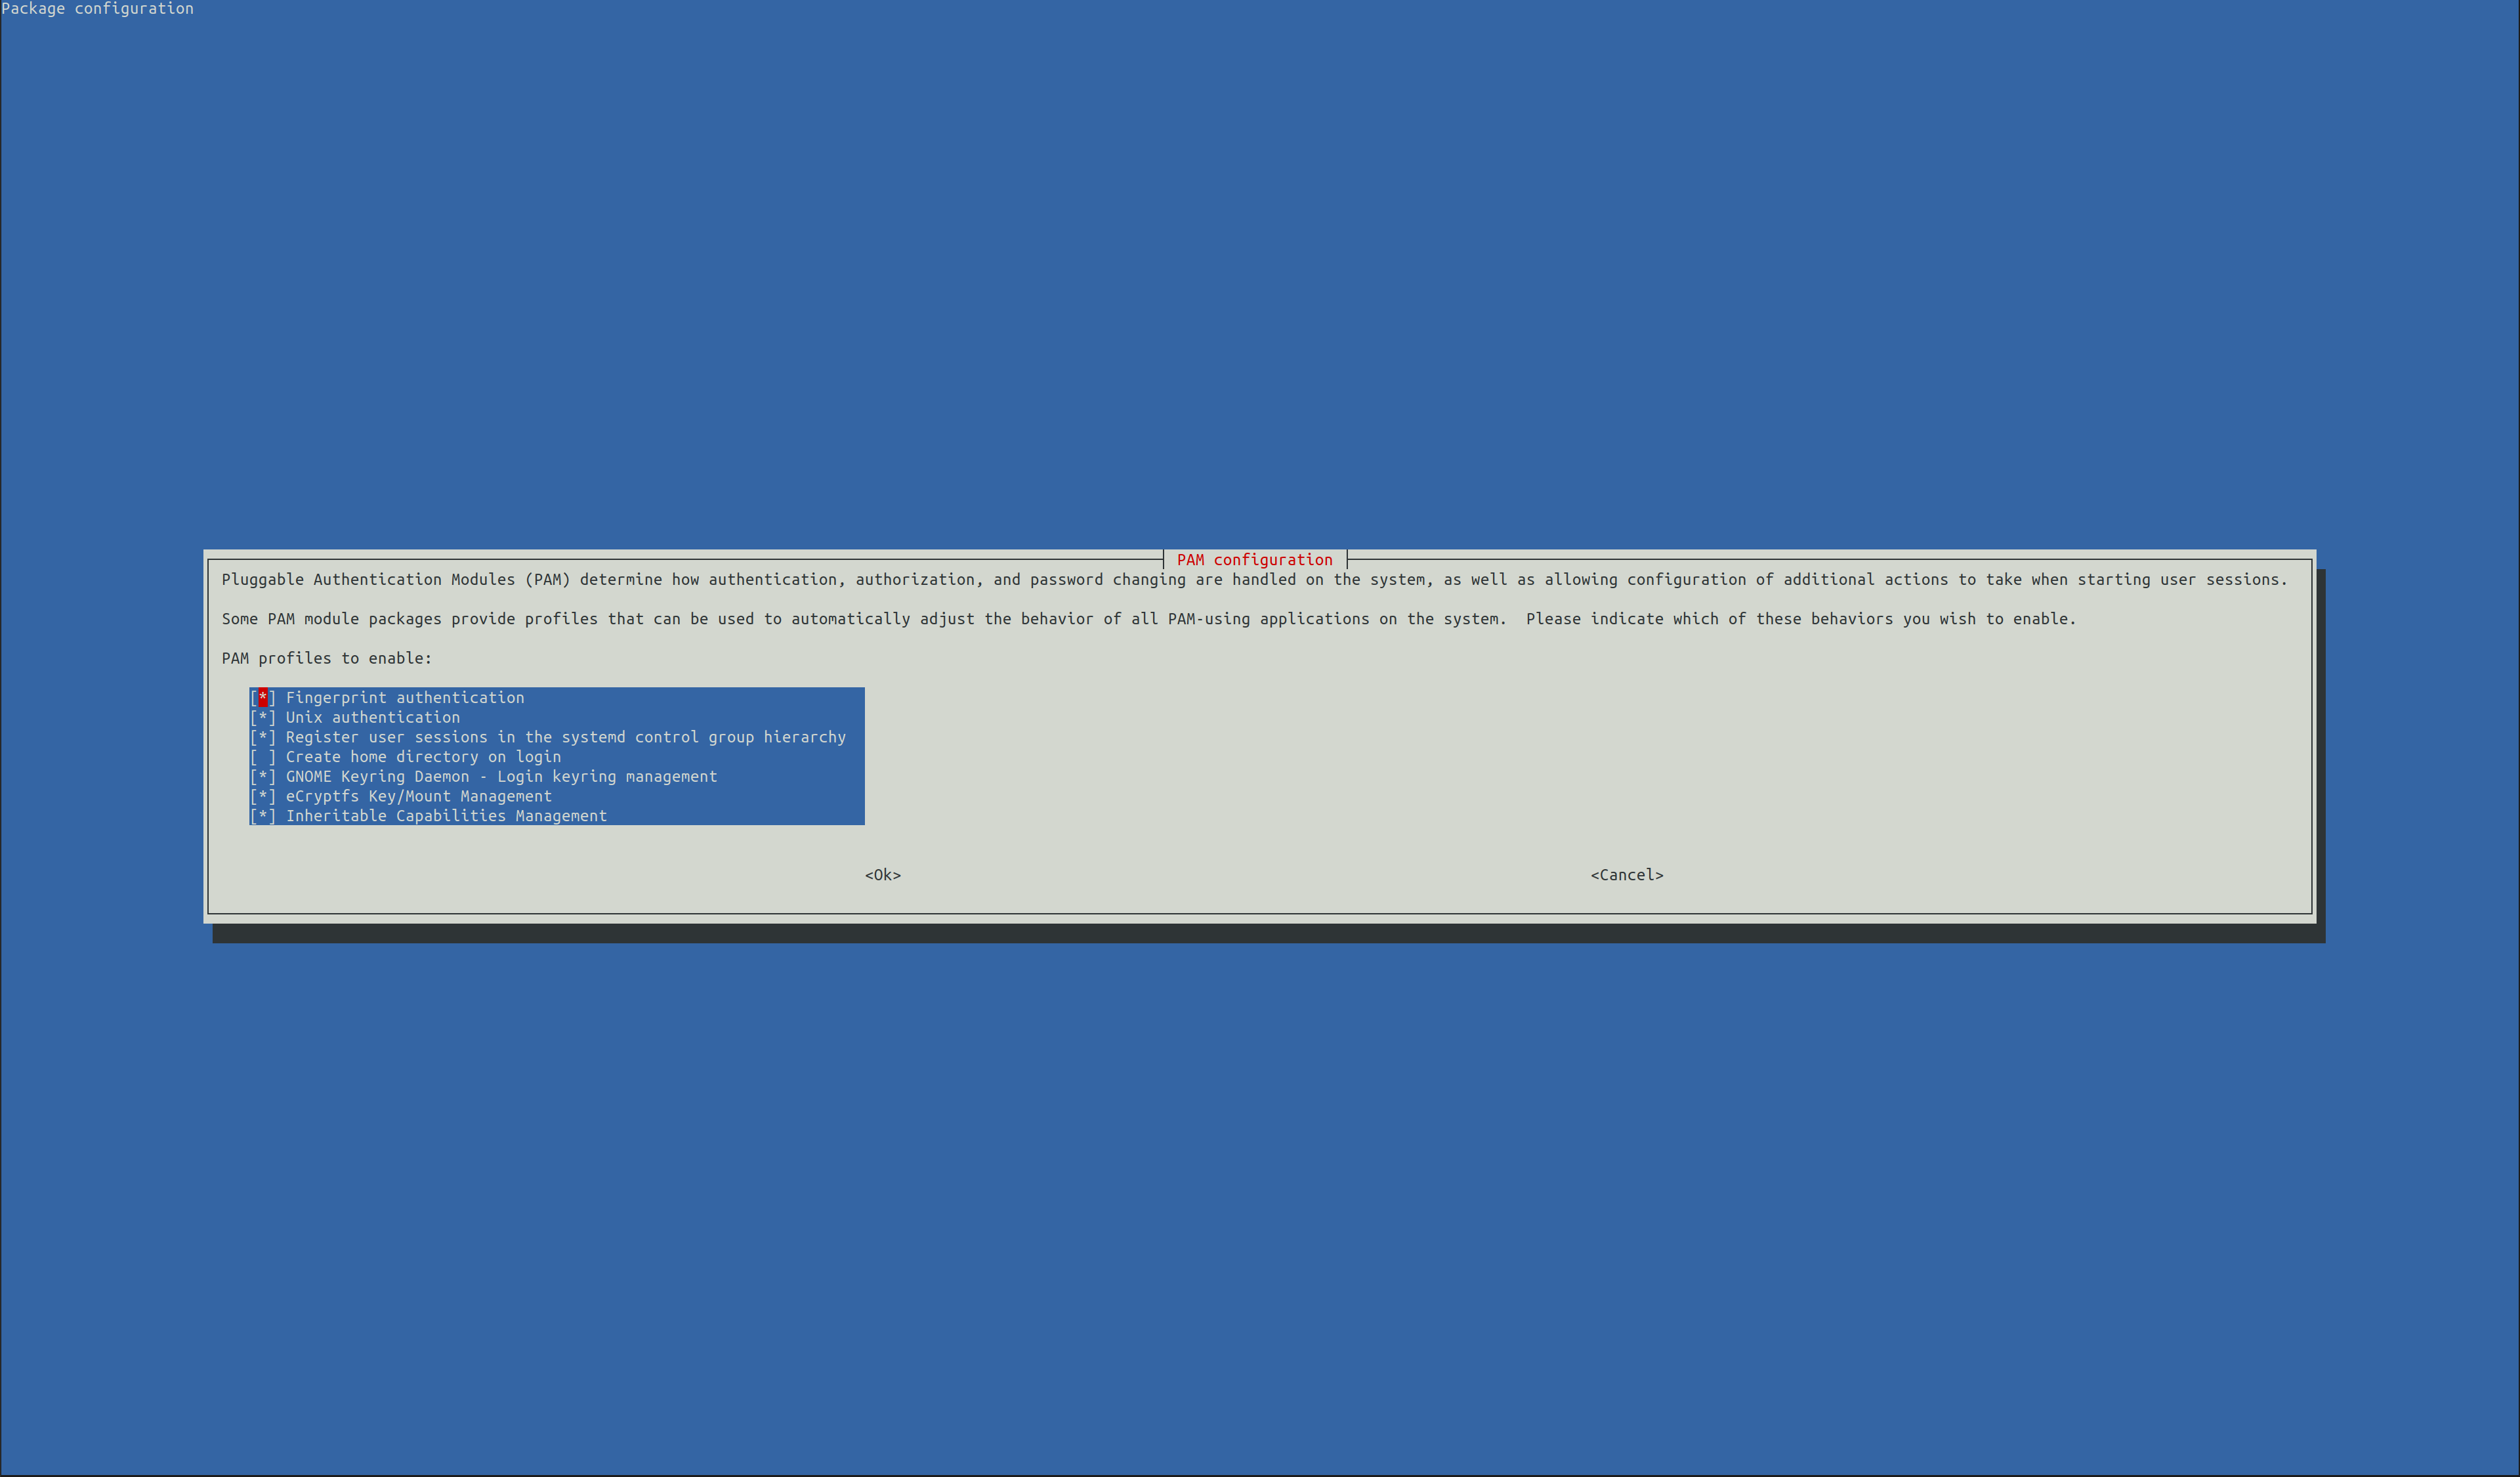
Select (marked using *) the Fingerprint authentication by pressing the Space on your keyboard and then press Tab to move onto the <Ok> option and then press Enter to save.
That's that!! The fingerprint authentication should now work in the desired places e.g. in the login screen.
Notes:
- Although, I'm using Linux Mint 21, the above instructions should work on any Ubuntu (and derivatives) version 20.04 or later.
-
Ubuntu might remove the
focal(20.04) repositories after it reaches EOL. When that happens, on step 1, changing the release codename for repositories to a supported Ubuntu release would be necessary (assuming Ubuntu keeps the packages used here in the same repository addresses). - The fingerprint device must match the one I have (mentioned at the top) on my Dell XPS 13 9310. As Dell ships XPS 13s with different parts for different regions, the device might not match.
Comments
Comments powered by Disqus